In LaTeX, lists are usually in a single column, but if you want to make them look more organized and visually appealing, multi-column lists are a great option! Using multi-columns not only makes better use of the page space, but it also makes lists look tidier and more attractive.
For checklists, to-do lists, or arranging various items side-by-side, LaTeX offers some fantastic packages, like multicol, tasks, and minipage. Let’s dive in and see how you can use these to create multi-column lists with ease!
multicol package
The multicol package is one of the most popular and accessible packages for creating multi-column content. When you need to display a lot of information or items across multiple columns, this package works wonderfully.
\begin{multicols}{n}
    \begin{itemize}
        \item Item 1
        \item Item 2
        ............
        ............
        \item Item n
    \end{itemize}
\end{multicols}
First, where you want to create a multi-column list, use the \begin{multicols}{n} ... \end{multicols} command. Here, n lets you specify the number of columns you want. Then, place the list of items (ordered or unordered) within the multicol environment.
\documentclass{article}
\usepackage{multicol,lipsum}
\begin{document}
 \begin{multicols}{2}
   \begin{itemize}
     \item Canada
     \item Japan
     \item Australia
     \item Brazil
     \item Germany
     \item South Korea
   \end{itemize}
 \end{multicols}

\noindent\lipsum[2][1-4]

\begin{multicols}{3}
 \begin{enumerate}
    \item Apple
    \item Banana
    \item Mango
    \item Orange
    \item Pineapple
    \item Strawberry
    \item Watermelon
    \item Blueberry
    \item Grapes
    \item Papaya
    \item Kiwi
    \item Pomegranate
 \end{enumerate}
\end{multicols}

\noindent\lipsum[3][1-3]

\setlength{\columnseprule}{0.4pt}
\begin{multicols}{4}
 \begin{itemize}
    \item US
    \item Canada
    \item Brazil
    \item UK
    \item Germany
    \item France
    \item Japan
    \item Australia
    \item India
    \item China
    \item South K.
    \item South A.
 \end{itemize}
\end{multicols}
\end{document}
Output:
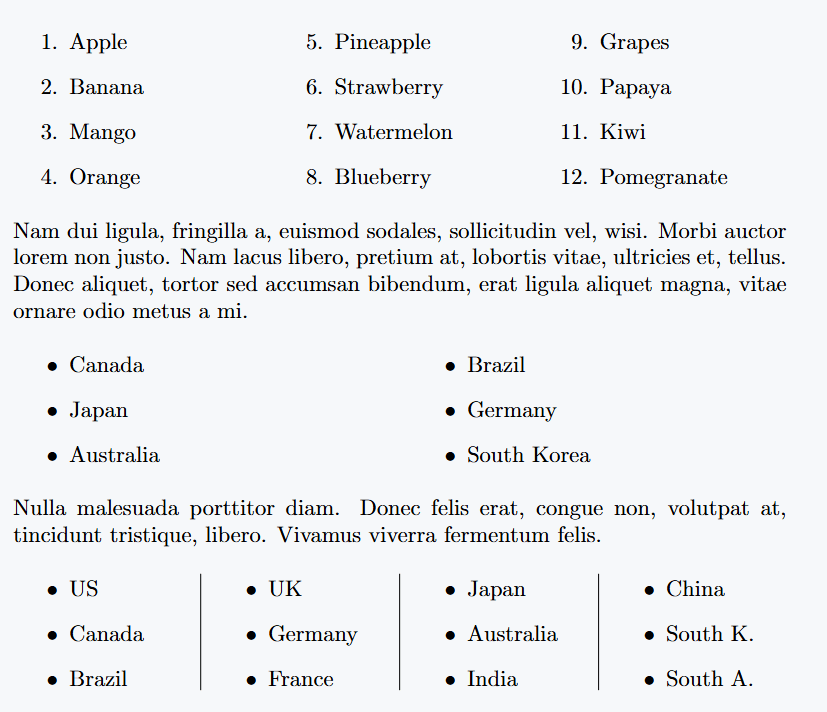
If the number of items is even, the items will be evenly distributed across each column. However, if the number of items is odd, the last column will have one item less.
In other words, the last column will have fewer items compared to the other columns.
tasks package
If you want to create a checklist, to-do list, or step-by-step guide, the tasks package is a top choice. This package allows you to organize multi-column lists in an even more visually appealing and structured way.
\begin{tasks}(n)
    \task Task 1
    \task Task 2
     ...........
     ...........
    \task Task n
\end{tasks}
First, add \usepackage{tasks}. Then, use \begin{tasks}(n) ... \end{tasks}, where n is the number of columns, to write your items.
\documentclass{article}
\usepackage{tasks,lipsum}
\begin{document}
Here’s an example with different task names:
\begin{tasks}(2)
    \task Review project requirements
    \task Design initial mockups
    \task Develop main features
    \task Test functionality
    \task Finalize documentation
    \task Prepare for launch
    \task Conduct feedback sessions
    \task Deploy to production
\end{tasks}

\lipsum[1][1-3]

\begin{tasks}(3)
    \task Apple
    \task Banana
    \task Mango
    \task Orange
    \task Pineapple
    \task Strawberry
    \task Watermelon
    \task Blueberry
 \end{tasks}
\end{document}
Output:
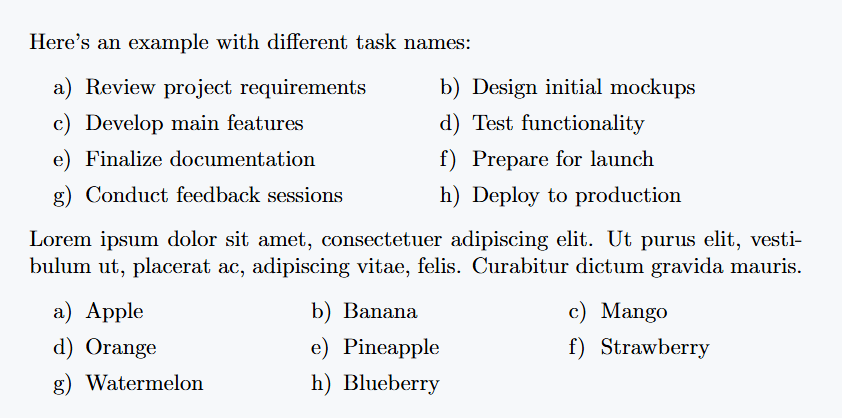
This way, you can use the tasks package to neatly divide tasks into multiple columns.
Creating multicolumn lists with the minipage environment
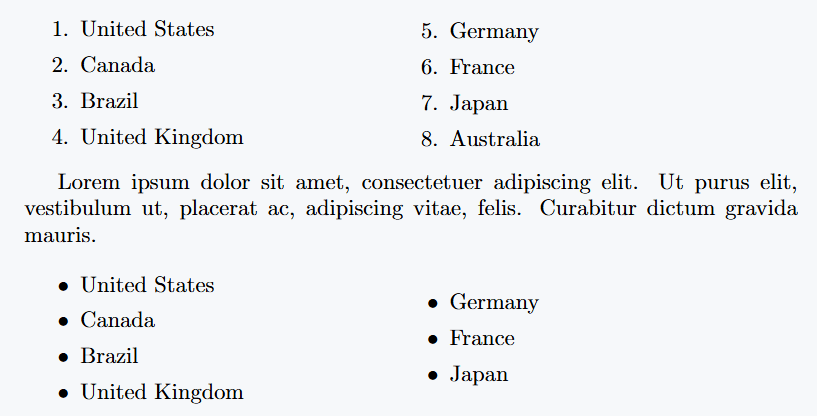
The minipage environment is mainly used in LaTeX to arrange content as if it’s in separate columns.
Let’s say you want to place multiple lists or some specific items side by side—this is where minipage becomes really useful. You can also combine it with itemize or enumerate environments.
\begin{enumerate}
  \begin{minipage}{0.45\textwidth}
    \item item 1
    \item item 2
\end{minipage}
\hfill
\begin{minipage}{0.45\textwidth}
    \item item 3
    \item item 4
  \end{minipage}
\end{enumerate}
\documentclass{article}
\usepackage{lipsum}
\begin{document}

\begin{enumerate}
\begin{minipage}{0.45\textwidth}
    \item United States
    \item Canada
    \item Brazil
    \item United Kingdom
\end{minipage}
\hfill
\begin{minipage}{0.45\textwidth}
    \item Germany
    \item France
    \item Japan
    \item Australia
\end{minipage}
\end{enumerate}

\lipsum[1][1-3]
\vspace{10px}

\begin{itemize}
 \begin{minipage}{0.45\textwidth}
    \item United States
    \item Canada
    \item Brazil
    \item United Kingdom
\end{minipage}
\hfill
\begin{minipage}{0.45\textwidth}
    \item Germany
    \item France
    \item Japan
 \end{minipage}
\end{itemize}
\end{document}
Output:
Conclusion
See how many ways there are to create multi-column lists in LaTeX. Each method has its own unique features and usefulness.
You can use multicol for easily making multi-column lists, or go with the tasks package for creating checklists or step-by-step guides.
On the other hand, using the minipage environment, you can create more specific and parallel lists. Hope this makes everything crystal clear for you!
Jidan
LaTeX enthusiast and physics educator who enjoys explaining mathematical typesetting and scientific writing in a simple way. Writes tutorials to help students and beginners understand LaTeX more easily.